How to install Dimple Floor
Dimple Floor can be installed on most surfaces, including uneven and cracked surfaces, however, you should prepare your surface by removing debris, filling large cracks or holes and removing spills. Install Dimple Floor on dry surfaces only.
The below diagrams demonstrate a 3m x 3m (9m2) coverage area however, the methods apply to any size area.
What you'll need
Utility Knife or Jig Saw
Metal Ruler
Rubber Mallet
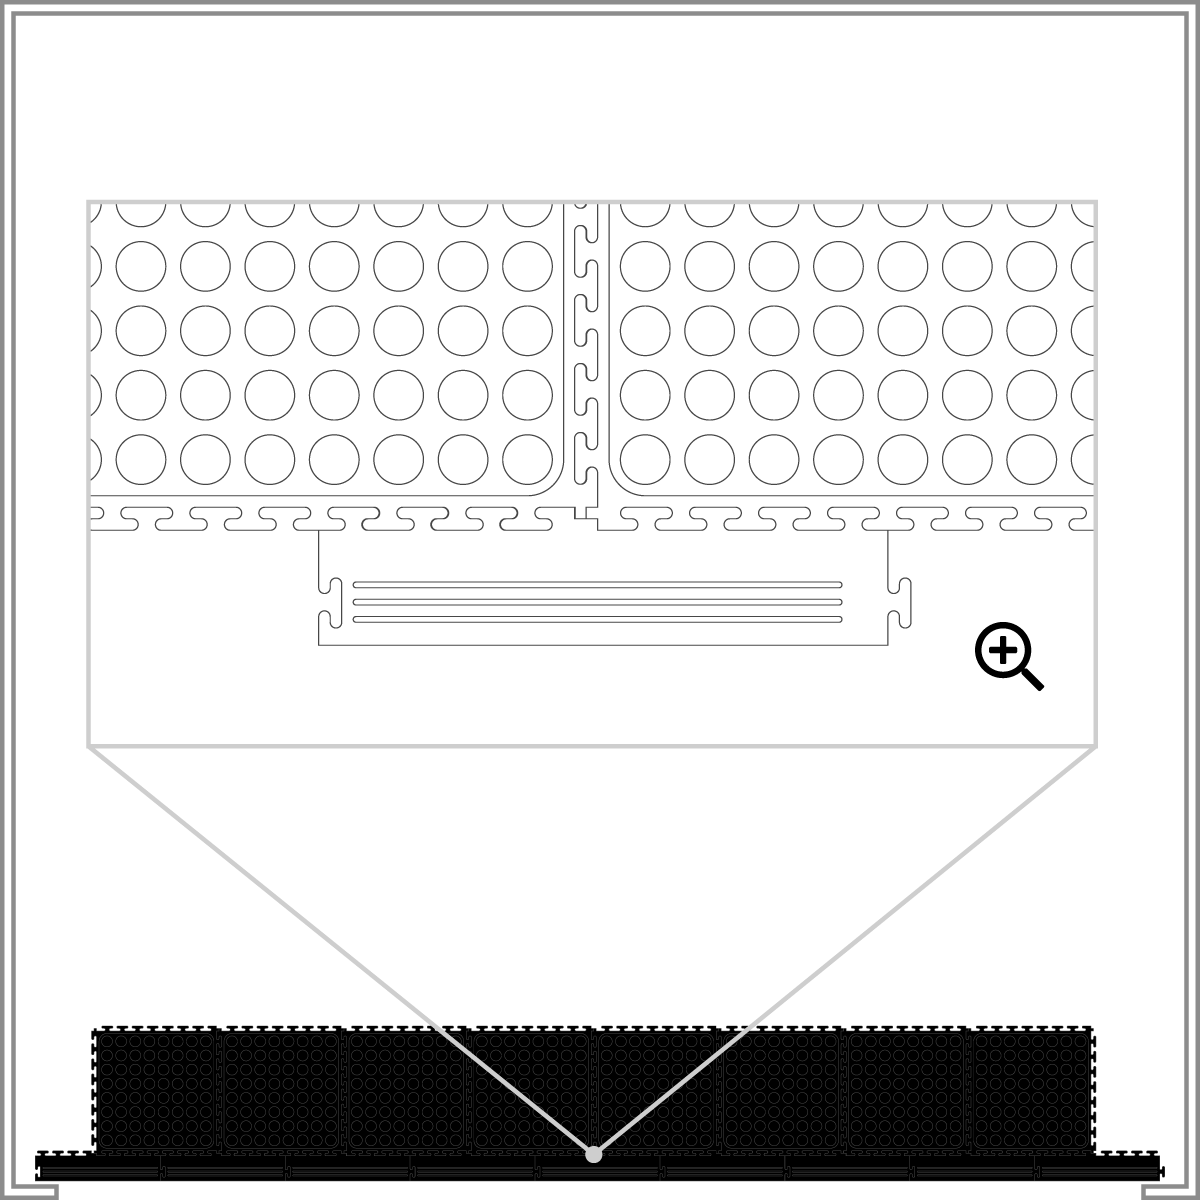
Place edge and first row tiles
Connect the edge pieces along the entrance/front of the floor area being covered (either under or behind the door seal if flooring a garage).
Connect the first row of tiles, from the centre out, leaving an even gap at both ends. Use a rubber mallet to tap interlocking edges securely in place.
Note - the edge piece connects on the centre join of two tiles.
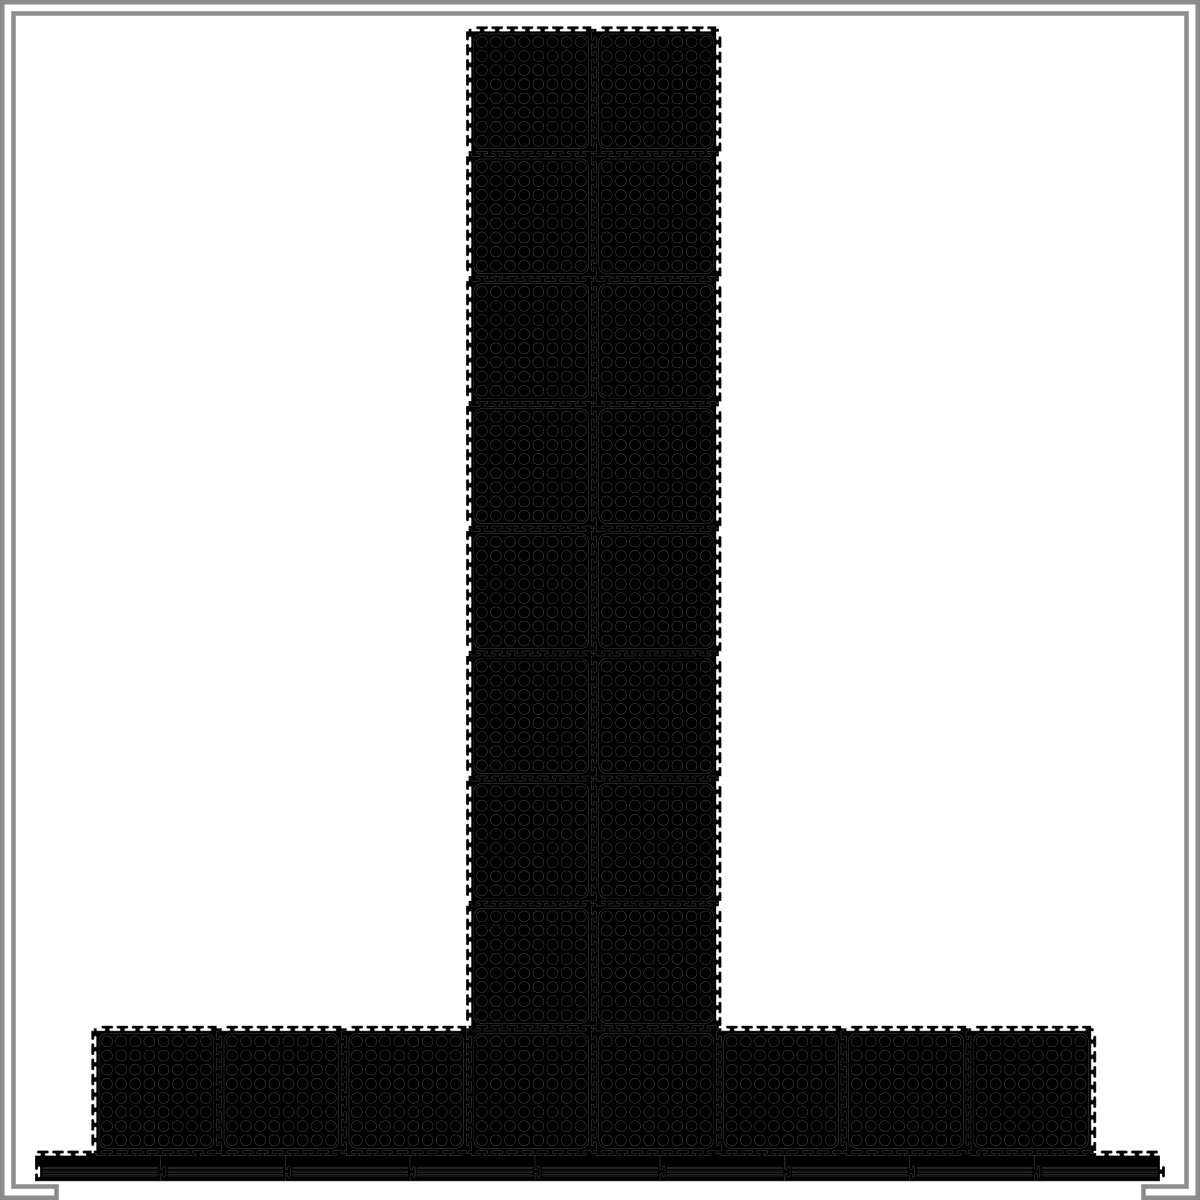
Connect two centre columns
Connect two centre columns of tiles all the way to the back edge or wall of your floor area.
Depending on the size of the area, you may need to leave a gap which can be filled later, from cutting additional tiles to fit.
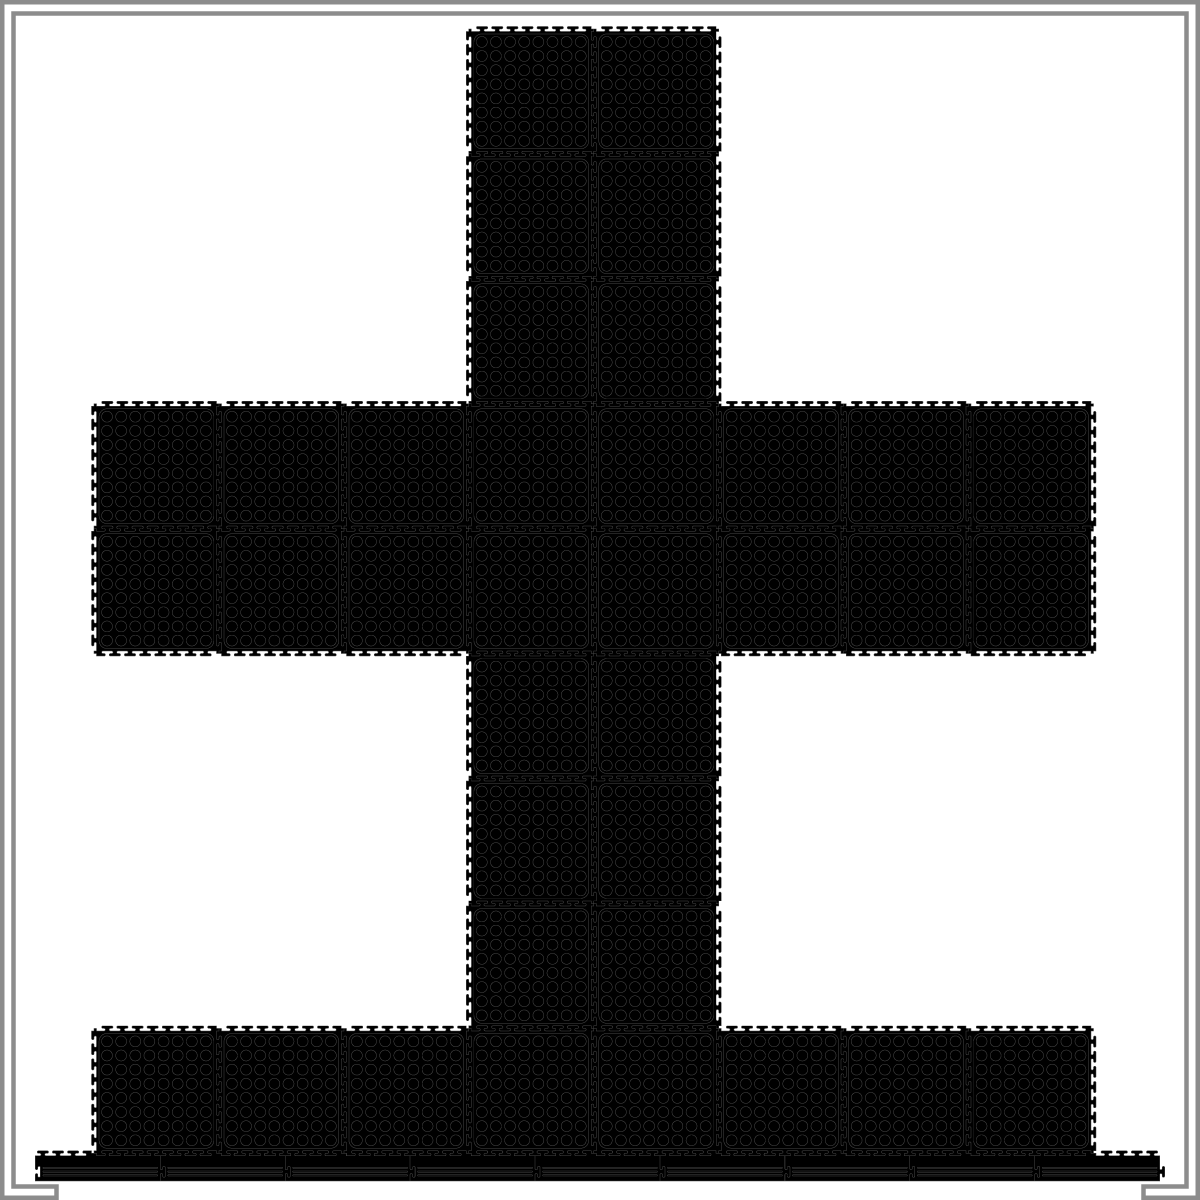
Connect centre rows and reposition.
Connect two centre rows starting from the center columns out towards the side edges or walls of your area.
Reposition the structure to be centered on your floor area, leaving an even gap on all sides.
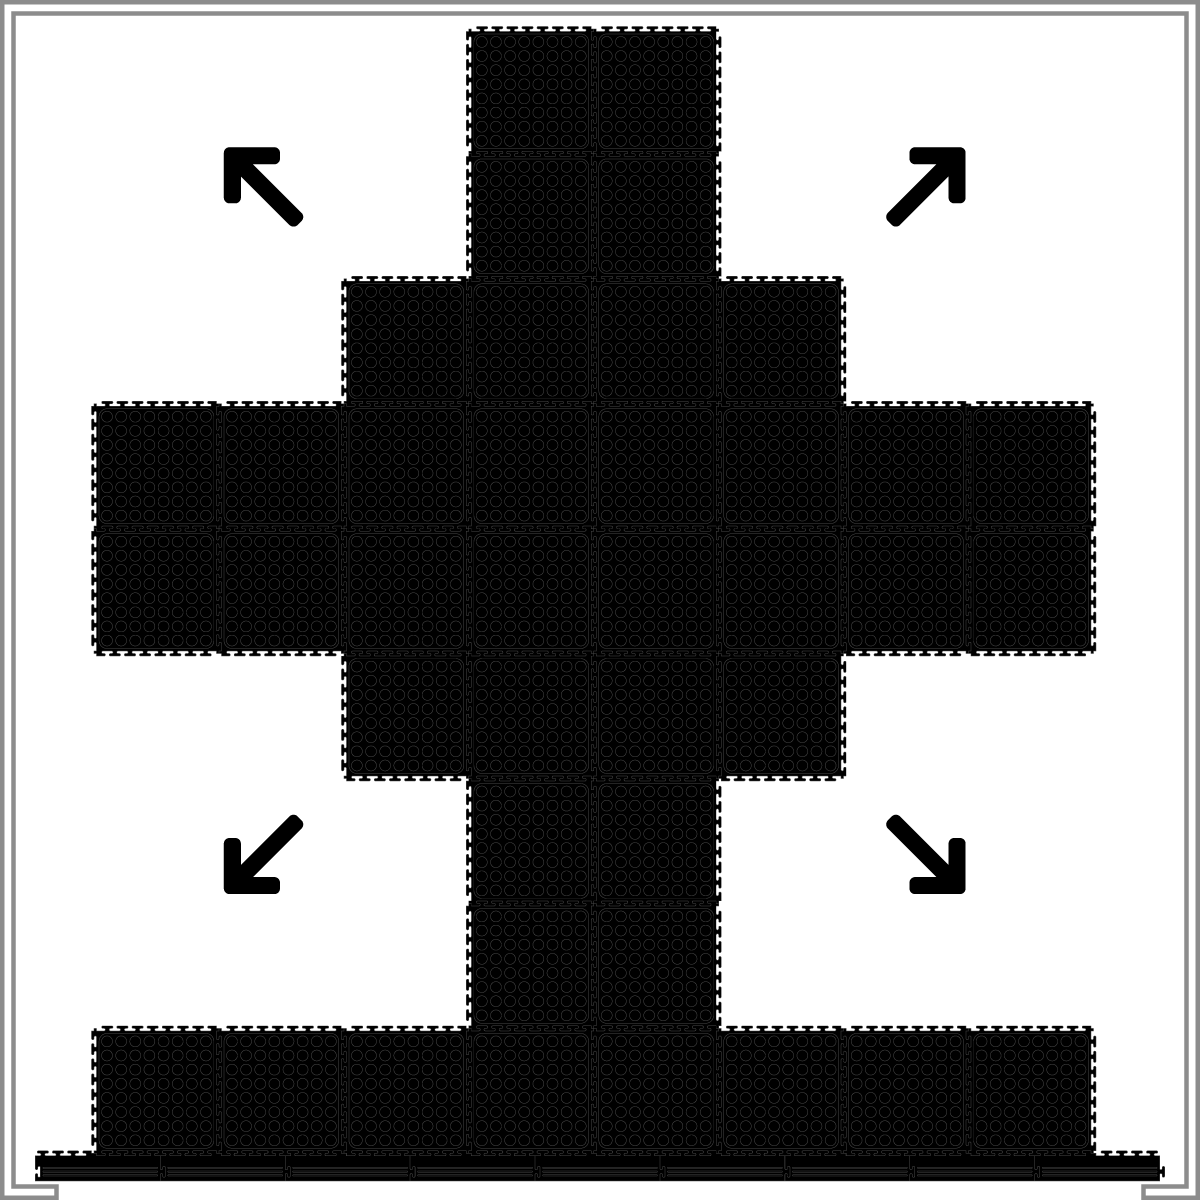
Connect tiles to fill the remaining floor area.
Working from each centre corner outwards, connect tiles to fill the remaining floor area.
Leave an even gap on all sides with enough room to cut strips of tiles to fill each gap.

Measure and cut tiles to fit edge gaps.
Using a utility knife or jig saw, cut tiles to the measured size of the remaining edge gaps and connect to complete the installation.
Tip: leave tiles in direct sunlight for a few minutes to soften, making cutting easier. Allow to cool and firm for 4-5 minutes before connecting with other tiles.
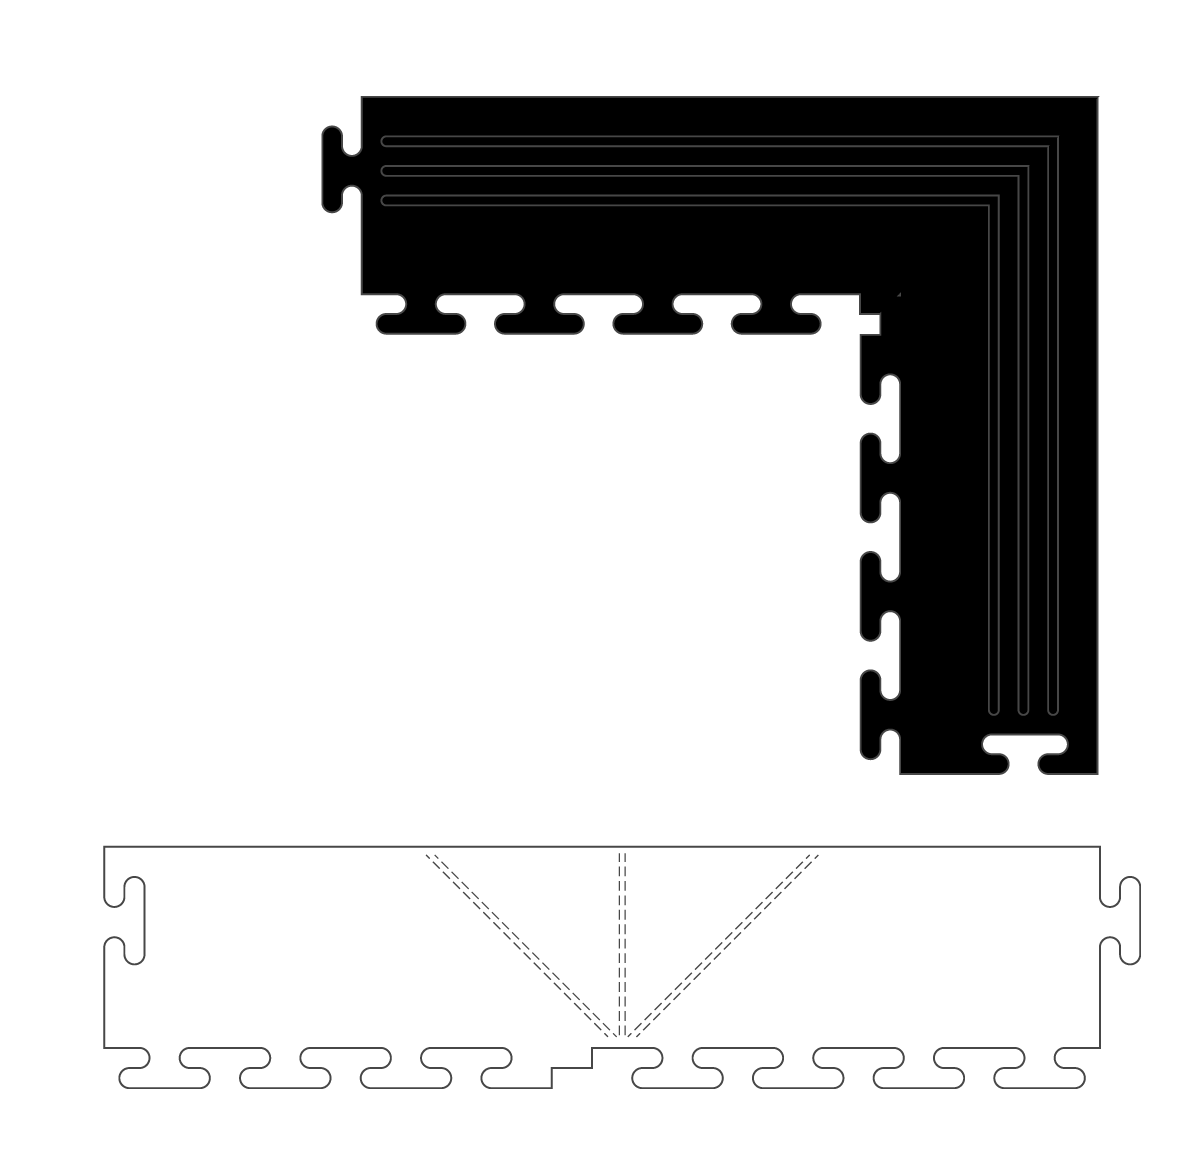
Corner Edges
If your area requires edging along two perpendicular sides, you can cut the meeting edge tiles on a 45° angle to create a flush corner edge.
Before starting, identify the edge tiles with grooved cut markings on the underside. Using a metal ruler and utility knife, cut off the excess to create a corner edge piece.
Tip: leave tiles in direct sunlight for a few minutes to soften, making cutting easier. Allow to cool and firm for 4-5 minutes before connecting with other tiles.